
Introduction
In product design and engineering, not every component can be modeled using solid features alone. Complex aerodynamic forms, consumer product casings, and industrial housings often demand precision surfaces that go beyond extrudes and revolves.
Fusion 360 offers a powerful Surface Modeling environment, allowing designers to create, edit, and refine surfaces with a high degree of flexibility. Unlike freeform sculpting, surface modeling provides precision-driven workflows for creating controlled, manufacturable designs.
This article dives into:
- Fundamentals of surface modeling.
- Core tools for creating surfaces.
- Advanced workflows for editing and refining.
- Hybrid modeling with solids and surfaces.
- Real-world applications.
- Best practices and common pitfalls.
By the end, you’ll have a clear roadmap for mastering advanced surface creation and editing in Fusion 360.
What Is Surface Modeling in Fusion 360?
Surface modeling is a CAD technique for defining objects through surfaces rather than solids. Instead of creating a fully enclosed body, designers work with open faces that can later be stitched into solids.

Key Characteristics:
- NURBS-based geometry ensures precision.
- Surfaces are infinitely thin with no thickness.
- Ideal for complex curvature and aesthetic design.
- Supports hybrid workflows where surfaces merge with solid bodies.
This makes surface modeling particularly valuable in industries like automotive, aerospace, consumer products, and industrial design.
Fusion 360’s Surface Workspace
To access surface tools:
- Switch to Design workspace.
- Enable the Surface tab in the toolbar.
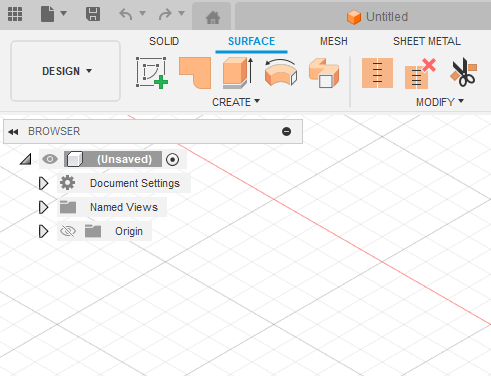
Here, you’ll find tools grouped under:
- Create: For generating surfaces.
- Modify: For editing and refining surfaces.
- Utilities: For inspection and analysis.
Creating Surfaces – Core Tools
Fusion 360 provides multiple methods for creating surfaces. Let’s explore the most important ones:
1. Extrude Surface
- Extends a sketch profile or face into a surface.
- Useful for flat or linear surfaces.
2. Revolve Surface
- Rotates a sketch around an axis.
- Perfect for bottles, bowls, lenses.
3. Sweep Surface
- Extrudes a sketch along a path.
- Ideal for pipes, tubes, and organic connectors.
4. Loft Surface
- Connects multiple profiles with smooth transitions.
- Essential for complex, free-flowing designs (e.g., car bodies).
5. Patch
- Closes gaps between surfaces or fills holes.
- Helpful for repairing geometry.
6. Offset Surface
- Creates a new surface offset from an existing one.
- Often used in shelling or tolerance studies.
7. Ruled Surface
- Extends from an edge in a linear or normal direction.
- Used for draft surfaces or mold parting lines.
Advanced Surface Creation Workflows
Beyond basic tools, advanced workflows involve combining and refining surfaces to create sophisticated geometry.
Workflow 1: Multi-Profile Loft with Guide Curves
- Use Loft with multiple profiles.
- Add guide rails for curvature control.
- Common in automotive panel design.
Workflow 2: Sweep with Twist
- Use Sweep with path + guide rail.
- Apply twist angle for helical surfaces.
- Great for propellers, impellers, and decorative geometry.
Workflow 3: Surface Patching + Trimming
- Use Patch to fill open boundaries.
- Apply Trim to refine the exact edges.
- Useful in repairing imported geometry.
Workflow 4: Surface Thickening to Solids
- Once surfaces are complete, use Thicken to turn them into solids.
- Ideal for shells, casings, or thin-walled designs.
Editing and Refining Surfaces
Creating surfaces is only half the challenge—editing workflows are crucial for achieving manufacturable geometry.
1. Stitch
- Joins multiple adjacent surfaces into a watertight solid.
- Essential for converting surface models into solids.
2. Trim
- Cuts surfaces using sketches, edges, or other surfaces.
- Used for removing excess geometry.
3. Extend
- Prolongs a surface beyond its current boundary.
- Helps in overlapping and stitching later.
4. Untrim
- Restores a surface’s original extent before trimming.
- Useful for re-editing imported geometry.
5. Replace Face
- Swaps a solid face with a surface.
- Allows for quick geometry refinement.
6. Move Face
- Adjusts faces without rebuilding the entire surface.
- Provides flexibility in late-stage edits.
Hybrid Modeling – Surfaces + Solids
One of Fusion 360’s strengths is hybrid modeling, combining surface workflows with solid features.
Example Workflow – Automotive Mirror Housing:
- Create main body using Loft and Sweep surfaces.
- Stitch surfaces into a closed solid.
- Use Solid modeling tools for mounting brackets.
- Apply fillets and chamfers to transition edges.
This flexibility makes Fusion 360 powerful for designs where aesthetic surfaces meet functional features.
Surface Analysis Tools
Precision is critical in advanced modeling. Fusion 360 offers inspection tools for evaluating surfaces.
- Curvature Map Analysis: Visualizes smoothness across surfaces.
- Zebra Analysis: Highlights reflections for continuity checks.
- Draft Analysis: Ensures manufacturability for injection molding.
- Section Analysis: Reveals internal profiles.
These tools help ensure Class-A surface quality, particularly in automotive and consumer product design.
Real-World Applications of Surface Modeling
1. Automotive Design
- Car hoods, doors, aerodynamic panels.
- Smooth Class-A surfacing for aesthetics.
2. Aerospace Engineering
- Wing profiles, fuselage surfaces.
- Critical for aerodynamics and manufacturability.
3. Consumer Electronics
- Smartphone casings, headphones, laptops.
- Complex curvature combined with solid internals.
4. Medical Devices
- Surgical tools, prosthetic shells.
- Requires ergonomic yet precise surfaces.
5. Industrial Design
- Furniture, power tools, home appliances.
- Blending beauty with function.
Advantages of Fusion 360 Surface Modeling
- Precision: NURBS-based surfaces ensure accuracy.
- Flexibility: Works with both solids and freeform.
- Integration: Seamlessly connects with CAM, Simulation, and Rendering.
- Repair Tools: Patch and stitch imported CAD files.
- Cloud Collaboration: Enables teamwork across industries.
Limitations of Surface Modeling
- Complexity: Steeper learning curve compared to solids.
- Performance: Heavy surface models slow down assemblies.
- Conversion Issues: Stitching may fail if edges don’t align.
- Manufacturability: Requires checks for real-world production.
Best Practices for Advanced Surface Modeling
- Plan Geometry: Start with reference sketches and guide curves.
- Work in Sections: Build surfaces modularly, then stitch together.
- Keep Surfaces Simple: Avoid over-complicating with too many edges.
- Validate Early: Use curvature analysis to catch issues before stitching.
- Leverage Symmetry: Reduces workload and ensures balance.
- Blend with Solids: Convert to solid bodies before final detailing.
Common Mistakes to Avoid
- Ignoring Continuity: Failing to check curvature leads to visible seams.
- Overuse of Patching: Excessive patching creates messy geometry.
- Uncontrolled Trimming: Leads to fragmented surfaces that are hard to stitch.
- Skipping Analysis: Surfaces may look fine but fail manufacturability tests.
- Neglecting Solids: Relying only on surfaces can cause structural gaps.
Case Study – Designing a Drone Shell
- Sketch Curves for drone body profile.
- Create Loft surfaces between top and bottom profiles.
- Use Sweep for arm extensions.
- Apply Trim and Patch to close gaps.
- Stitch surfaces into solid body.
- Add solid features: motor mounts, screw holes, ventilation slots.
- Finalize with fillets and draft analysis for moldability.
Result: A lightweight, aerodynamic, and manufacturable drone shell.
Fusion 360 vs. Other Surface Modeling Tools
| Software | Surface Modeling Strength | Typical Use Case | Limitation |
|---|---|---|---|
| Fusion 360 | Advanced surfaces + solids + CAM | Hybrid design workflows | Complex Class-A surfacing limited compared to Alias |
| Autodesk Alias | Industry-standard Class-A surfaces | Automotive, aerospace | Expensive, steep learning curve |
| Rhino 3D | Strong NURBS surfacing | Architecture, industrial design | Weak in parametric editing |
| SolidWorks | Solid-surface hybrid | Mechanical parts | Less flexible for complex surfaces |
| CATIA | Enterprise-class surfacing | Aerospace, automotive | Cost + complexity |
Fusion 360 stands out as the most balanced option for professionals needing both surface precision and solid engineering integration.
Future of Surface Modeling in Fusion 360
Autodesk is continuously upgrading Fusion 360’s surfacing capabilities:
- AI-assisted surface repair for imported models.
- Improved continuity tools for Class-A surfacing.
- Better integration with mesh workflows for reverse engineering.
- Generative surface tools to optimize aerodynamic forms.
The evolution is moving toward faster, smarter, and more automated surfacing tools.
Conclusion
Surface modeling in Fusion 360 is a powerful toolset for creating complex, precise, and aesthetic geometry that solid modeling alone cannot achieve. By mastering advanced creation workflows like lofts with guide curves, sweeps with rails, and surface patching, designers can handle sophisticated designs across industries.
Editing tools like Trim, Extend, and Stitch ensure surfaces remain clean, manufacturable, and seamlessly integrated with solid bodies. Combined with analysis tools, designers can meet real-world production standards.
Whether you’re designing car panels, medical devices, or consumer electronics, Fusion 360’s surface modeling equips you with the flexibility to combine creativity and engineering precision.
👉 The key is not just creating surfaces, but refining them through workflow discipline, analysis, and hybrid modeling. This is what separates a beginner from a professional-level Fusion 360 surface modeler.