

Introduction
AutoCAD is a powerful design tool that is widely used across various industries, including architecture, engineering, and construction. One of the most effective ways to enhance your productivity in AutoCAD is by mastering its keyboard shortcuts. These shortcuts allow you to execute commands quickly, streamline your workflow, and focus more on your design rather tha n navigating through menus. This article provides a comprehensive list of essential AutoCAD shortcuts that every user should learn, whether you’re a beginner or an experienced professional.
Why AutoCAD Shortcuts Are Important
AutoCAD is a feature-rich software with a wide range of tools and commands. While the graphical user interface (GUI) provides access to all these features, navigating through multiple menus can be time-consuming. Keyboard shortcuts offer a faster alternative, allowing you to perform tasks with just a few keystrokes. By learning and using these shortcuts, you can work more efficiently, reduce the time spent on repetitive tasks, and increase your overall productivity.
Basic AutoCAD Shortcuts for Drawing
LINE (L)
The LINE shortcut is one of the most fundamental in AutoCAD. By typing “L” and pressing Enter, you can start drawing a line immediately. This shortcut is indispensable for creating the basic building blocks of any design.
CIRCLE (C)
To draw a circle, simply type “C” and press Enter. This shortcut allows you to quickly create circles by specifying the center point and radius, making it ideal for tasks involving round objects or holes.
RECTANGLE (REC)
The RECTANGLE shortcut “REC” is used to draw rectangles by specifying two opposite corners. This shortcut is particularly useful for creating rectangular shapes like frames, boxes, or layout outlines.
POLYLINE (PL)
To create a series of connected line segments or arcs, use the POLYLINE shortcut “PL.” This command is efficient for drawing shapes that require continuous lines, such as paths or outlines.
ARC (A)
The ARC shortcut “A” allows you to draw arcs by specifying three points: the start point, a point on the arc, and the endpoint. This is particularly useful for creating curved sections in your designs.
Also Read – Best Mouse for CAD
Advanced Drawing Shortcuts
HATCH (H)
The HATCH shortcut “H” fills an enclosed area with a pattern or solid color. Hatching is commonly used to represent different materials or to highlight specific areas in a drawing.
ELLIPSE (EL)
For drawing ellipses, use the ELLIPSE shortcut “EL.” This command is useful when you need to create oval shapes or elliptical arcs in your designs.
OFFSET (O)
The OFFSET shortcut “O” creates a parallel copy of an object at a specified distance. This shortcut is essential for creating multiple parallel lines, concentric circles, or similar elements that need to maintain consistent spacing.
Editing and Modification Shortcuts
MOVE (M)
The MOVE shortcut “M” allows you to move selected objects from one location to another within your drawing. This is one of the most frequently used shortcuts, enabling you to reposition elements quickly and accurately.
COPY (CO)
To duplicate objects within your drawing, use the COPY shortcut “CO.” This shortcut saves time when you need to create multiple instances of an object, such as repeating patterns or components.
ROTATE (RO)
The ROTATE shortcut “RO” rotates selected objects around a specified base point. This command is useful for positioning objects at specific angles, such as tilting a part of your design.
SCALE (SC)
To resize objects, use the SCALE shortcut “SC.” This command allows you to scale objects up or down by specifying a base point and a scale factor, ensuring that elements fit precisely within your design.
TRIM (TR)
The TRIM shortcut “TR” removes parts of objects that extend beyond or intersect with other objects. This is particularly useful for cleaning up your drawing by trimming lines or shapes to fit within specific boundaries.
EXTEND (EX)
The EXTEND shortcut “EX” lengthens objects to meet the edge of another object. This command is often used to extend lines or shapes to complete a design or fit within a defined area.
MIRROR (MI)
The MIRROR shortcut “MI” creates a mirrored copy of an object across a specified axis. This shortcut is ideal for creating symmetrical designs, such as mirrored components in architectural or mechanical drawings.
AutoCAD Shortcuts for Text and Annotation
TEXT (T)
The TEXT shortcut “T” allows you to add single-line text annotations to your drawing. This is useful for labeling parts of your design or adding notes.
MTEXT (MT)
For multi-line text blocks, use the MTEXT shortcut “MT.” This command provides more formatting options and is ideal for adding detailed descriptions or paragraphs to your drawings.
DIMENSION (D or DIM)
The DIMENSION shortcut “D” or “DIM” creates dimensions that indicate the size and measurements of objects in your drawing. This command is essential for adding precise measurements to technical drawings.
LEADER (LE)
The LEADER shortcut “LE” creates a leader line with an annotation at the end, typically used to point out or label specific parts of a drawing. This shortcut is useful for adding callouts or notes.
Layer Management Shortcuts
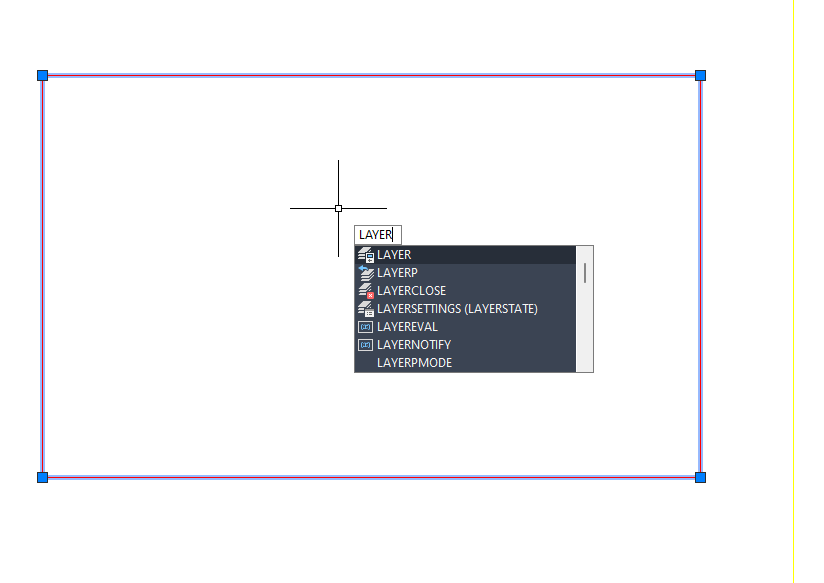
LAYER (LA)
The LAYER shortcut “LA” opens the Layer Properties Manager, where you can manage layers within your drawing. Layers help organize different elements of your design, making it easier to control visibility and editing.
LAYISO
The LAYISO shortcut isolates the selected layer(s), turning off all other layers. This is particularly useful when you need to focus on a specific part of your drawing without distractions.
LAYUNISO
The LAYUNISO shortcut restores the visibility of all layers after using LAYISO. This allows you to return to your full drawing view after focusing on a specific layer.
Object Selection and Navigation Shortcuts
ZOOM (Z)
The ZOOM shortcut “Z” allows you to zoom in and out of specific areas of your drawing. This is essential for navigating large drawings and focusing on details.
PAN (P)
The PAN shortcut “P” moves the view in the drawing area without changing the zoom level. This is useful for shifting your view to different parts of a large design.
UNDO (U)
The UNDO shortcut “U” reverses the last action taken. This is an essential shortcut for correcting mistakes or experimenting with different design options.
REDO (Ctrl + Y)
The REDO shortcut “Ctrl + Y” restores the last action that was undone. This command is useful when you need to revert to a previous state after using the UNDO command.
SELECTION (Ctrl + A)
The SELECTION shortcut “Ctrl + A” selects all objects in the drawing area. This is useful for applying a command or modification to the entire drawing at once.
Customizing AutoCAD Shortcuts
AutoCAD allows you to customize shortcuts through the Customize User Interface (CUI) editor. You can create your own shortcuts, change existing ones, and even create command aliases to further streamline your workflow. Customizing shortcuts to fit your personal workflow can significantly enhance your productivity.
Tips for Mastering AutoCAD Shortcuts
- Start with the Basics: Focus on learning the most commonly used shortcuts first, such as LINE (L), CIRCLE (C), and MOVE (M). Once you’re comfortable with these, gradually expand your knowledge to include more advanced shortcuts.
- Practice Regularly: The best way to master shortcuts is through regular practice. Incorporate them into your daily workflow until they become second nature.
- Create a Cheat Sheet: Keep a list of your most frequently used shortcuts nearby as you work. Over time, you’ll find that you need to refer to it less as the shortcuts become ingrained.
- Customize Your Shortcuts: Tailor the shortcuts to your needs by customizing them in the CUI editor. This can make your workflow even more efficient and personalized.
Suggested Read- AutoCAD for Beginners
Conclusion
Mastering AutoCAD shortcuts is a crucial step in becoming proficient with the software. These shortcuts allow you to work more efficiently, reduce the time spent on repetitive tasks, and focus more on the creative aspects of your designs. Whether you are a beginner just starting out or an experienced user looking to refine your skills, learning these shortcuts will significantly enhance your productivity and streamline your workflow in AutoCAD.
FAQs
What is the benefit of using AutoCAD shortcuts?
AutoCAD shortcuts save time and increase productivity by allowing users to execute commands quickly without navigating through menus. They streamline the design process and make it easier to focus on creating rather than managing tools.
How do I customize shortcuts in AutoCAD?
You can customize shortcuts in AutoCAD using the Customize User Interface (CUI) editor. This tool allows you to modify existing shortcuts, create new ones, and assign aliases to commands for a more personalized workflow.
What are the most essential shortcuts for beginners?
For beginners, essential shortcuts include LINE (L), MOVE (M), COPY (CO), and TRIM (TR). These commands form the foundation of most drawing and editing tasks in AutoCAD.
Can I use AutoCAD shortcuts on both Mac and Windows?
Yes, AutoCAD shortcuts are available on both Mac and Windows platforms, though some shortcuts may differ slightly between operating systems. The core functionality, however, remains consistent across both platforms.
How can I remember all the shortcuts?
Start by learning the shortcuts you use most frequently and practice them regularly. Keeping a cheat sheet handy and gradually expanding your knowledge to include more advanced shortcuts can also help in memorizing them.
What should I do if a shortcut doesn’t work?
If a shortcut doesn’t work, check the Command Line for any errors or conflicting commands. You can also reset or customize shortcuts using the CUI editor if necessary.